PointLightLab Tutorials
Tutorial - Using the "Bulk Set Pattern Layers" Tool
This tool is intended to generate sets of pattern layers within the one script block. Specifically where the pattern layers are intended to display the same model file with slight differences. The tool is quite flexible and can be used to generate a range of other related pattern layers or set selected properties of existing pattern layers.
Finding the "Bulk Set Pattern Layers" Tool
The tool is located on the Script Tools Menu, within the sub menu under "Edit Pattern Layers". This menu will only be visible if a script file is currently open in the editor.
Overview
This is a complex tool with a number of possible uses. The tool can be used to generate new pattern layers or to set the properties of existing pattern layers. In either case the tool operates on a single script block at a time. The tool has the ability to set numeric properties of the pattern layers to either the same value or the sequential values. This provides a means to generate an ascending or descending series of values on sequential layers. More complex permutations can be achieved by re-ordering the layers and by generating a number of small related groups of layers if you require a very complex set.
This tutorial focuses on two simple processes. The first generates a set of 5 pattern layers. The second process the demonstrates changing some of the properties of the existing layers as a group.
Step 1 - Create a new Script File
Open the file menu and select "New" then "Script File". This will create a default script file in the tree view pane. Clicking on the "Script Block [0]" node will expand it so the script property nodes are visible. Make sure you click on the text of the node to select it; this will be indicated by the background of the node turning blue. If there is no script block selected, the tool will not function.

And with the script block correctly selected...

Step 2 - Select the "Bulk Set Pattern Layers" Tool from the Menu
Now select the Script Menu, then hover your mouse over the "Edit Pattern Layers" Option and finally select the "Bulk Set Pattern Layers" Option. This should open the tool dialog. If you get a message box saying that no script block is selected, you need to select a script block first, then repeat this step.

Step 3 - Getting familiar with the Tool Dialog

As you can see there are quite a lot of options on this dialog. The first and most important are at the top left.
Step 4 - Setting the Number of Pattern Layers to Affect
At the top left of the dialog is a numeric box that controls how many pattern layers the tool will try to work with. Set this first. We will set this to 5 as we wish to create five new pattern layers.
![]()
Step 5 - Generate new layers or set existing layers
Choose between the two options below the numeric box. In the case where you choose to work with existing layers, the tool will start with the first layer in the script block.
![]()
Step 6 - Changing the properties to be set
The main body of the dialog contains a set of tab pages. These hold all the properties of a pattern layer in groups. These can be set in a number of ways depending on the type of the property.

If you wish to set a property, it must be "active" on the dialog. On each of the dialog pages you will find a check box next to each control and one in the top left corner of the tab page. These can be used to activate or deactivate single properties or whole groups of properties. The check box in the top left corner of the tab page will deactivate all the properties on the tab page.
NOTE - The default values in some of the controls are not valid for a script block so you will need to set some of them before you can test the script.
Step 7 - Setting the General Values Group of Properties

The first property we will set is the "Animation File Name". Click on the "browse" button at the right end of the text box and you will be presented with a file selection dialog. You need to navigate to a directory where you can select a model file. Alternately if you are a power user you can type a filename into the text box as either a relative or absolute path.
If your copy of PointLightLab is installed in the default installation directory, you will find model files in the C:\Program Files\DuncansTools\PointLightLab\Data\ directory. Navigate to it and select one of the model files. These have a .pllm file extension. We will use "StarjumpModel.pllm". Select this model file and click OK. The name of the file should now appear in the long text box. The file we have chosen contains the data to create a humanoid performing star jumps viewed from the front.
![]()
The remaining properties on the "General" tab should be fine with the default values. Move on to the "Model Dots" tab.
Step 8 - Setting the Model Dots Group of Properties
The properties in the "Model Dots" group control how many model dots will be in the pattern layer and their particular settings.
NOTE - The number of model dots must match the number of dots in the Animation File which was selected in the previous step.

The first property is the "Number of Dots" and it has two options. "Generate New Dots as Required" provides control over the situation where there is less than the specified number of Model Dots in the layer already. In this case the tool will add additional Model Dots up to the specified number if the option is activated. The second option is "Delete Any Excess Dots". This handles the second possible scenario where the layer contains more than the specified number of dots. In this case the tool will delete excess dots if the option is activated.
As you can see the number of dots is set to 12 by default. As this is the common number of dots in the model files supplied with PointLightLab. You can verify the number of dots in a model file quite easily by using the "Model Viewer" Utility. This is available via a button in the "Helpers" group on the top right side of the dialog. If you need more information about using the "Model Viewer" tool, check the Model Viewer tutorial.
The next settings we need to adjust are the "Model Dot Colour" values. The default value of 125 is a little close to the default value for the background in the script block, so the model dots will not show up very well. (Note that this may be desirable in an experiment where you are working with luminance perception) Set all three colour channels to 255. This will result in the Model Dots appearing as white on a dark background. Just right to see what the stimuli looks like.

The remaining properties in the "Model Dots" group will be acceptable with the default values. Now we will move on to the "Drift Region" group.
Step 9 - Setting the Drift Region Group of Properties
![]()
The only property we are going to set on this group is the "Origin X" property. This property controls the X axis component of the Origin of the drift region for the pattern layer. This essentially controls the placement of the model data on the screen for the pattern layer.
If we were to accept the default values for the drift region. All five pattern layers would produce the same figure doing the same movement in the same place on the screen. Effectively we would only see a single layer as the others would be obscured.
We will set this property to generate a slightly different value for each of the layers using the "Sequential Values" option. Click this option and you will see that the "Same Value" Numeric box has been deactivated, while the "Base Value" and "Increment by" boxes have been activated.
NOTE - The formula used to generate values using the "Sequential Values" option is a simple one. The "Base Value" is the value applied to the first pattern layer being affected. The second layer has a value of (Base Value + ( Increment By * 1)). The third layer has a value of (Base Value + (Increment By * 2)) etc.
Set the "Base Value" to -20 and the "Increment by" to 10. This will generate a sequence of ( -20, -10, 0, 10, 20). We are now nearly ready to generate the layers. The remaining two groups of properties, "Freckle Effect" and "Translation Effect" will not be used in the stimuli that we are building so we will disable those effects.
Step 10 - Disable the Freckle Effect
Select the "Freckle Effect" Tab and you will see a similar arrangement of controls to the previous tabs. The only property we will set on this tab is the "Active" property. By default the Freckle Effect is active. We want to set it to "Inactive".
![]()
Click the "Inactive" Option and we are done with this tab.

Step 11 - Setting the Translation Effect Properties
The translation effect properties are much like the Freckle Effect Properties. We will only change the Active Property to "Inactive" as we did for the "Freckle Effect" above.

Step 12 - Generating the new Pattern Layers
Now that all the properties are as we want them, the last task remaining is to generate the layers. Click the "Set" button at the lower right and the tool will go to work.
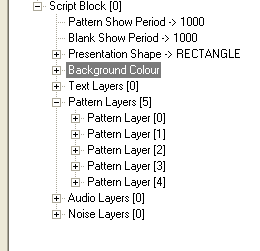
Once the tool is complete ( the dialog has disappeared ) you should be able to expand the tree nodes and verify that there are now five new pattern layers in the script block you had selected.

Step 13 - Testing the script in PLLPlayer
We should now have a valid script. All we have to do is save it and then test it in PLLPLayer. Click on the "File" menu to open it and then select the "Save As" option. Save the file somewhere appropriate. You will receive a confirmation dialog message once the file has been saved.
Once the file is saved, click on the "Script Tools" menu and select the "Test Script in PLLPlayer" option.

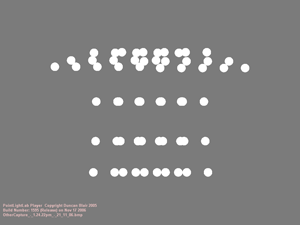
PLLPlayer should now load your new script and play it. Step through the information screens using the space bar and watch the stimuli you have created.

Wrap up
If you have a need stimuli that are composed of complex arrangements of pattern layers or time sequences of layers to control the visible frames of animation in the model, then this tool may be the easiest way to generate the permutations for your experiment.
Check part two to see how to use this tool to modify existing pattern Layers as a group.